
Create and Edit Materials
Use the Materials tool to create new materials.
Create Materials Based on the System Library
Create a material that is based on an existing predefined material in the System Library.
-
From the Feasibility ribbon, Setup tools, click the Materials tool.

-
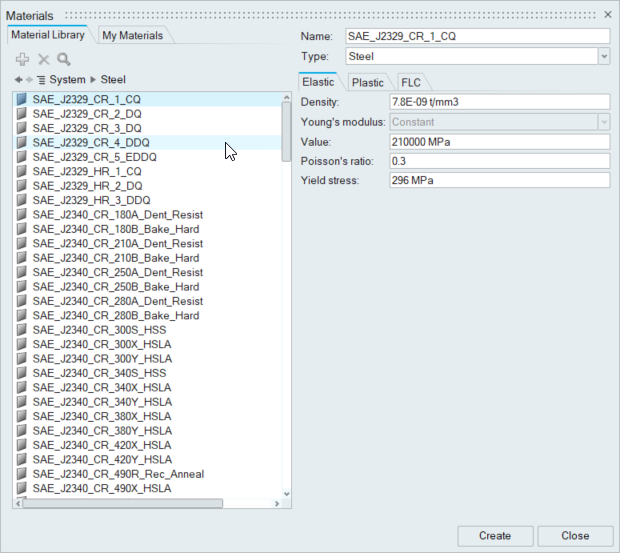
In the Materials dialog, Material Library tab, switch the
library to System.
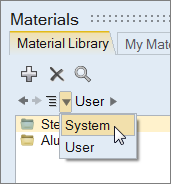
- Double-click Steel or Aluminum.
-
Select the material on which you would like to base your new material.
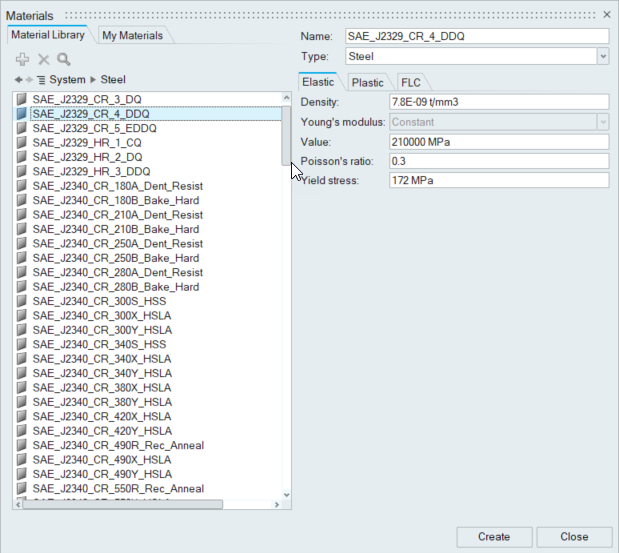
- Edit the material's name and properties.
-
Click Create.
The new material is created and stored in My Materials.
Edit Materials
Edit existing materials from a user library or the My Materials tab.
Restriction: You cannot edit materials directly from the System library.
Materials from the System library must be copied into a user library or the My
Materials location before you can make changes to them.
-
From the Feasibility ribbon, Setup tools, click the Materials tool.
- In the Materials dialog, click the Material Library tab and switch to the User library or click the My Materials tab.
- Select a material to edit.
- Edit the material name, type or properties as required.
- Click Update.
Delete Materials
Remove any existing materials from a user library or the My Materials tab.
Restriction: You cannot delete materials from the System library.
-
From the Feasibility ribbon, Setup tools, click the Materials tool.
- In the Materials dialog, click the Material Library tab and switch to the User library or click the My Materials tab.
- Select the material to delete.
-
Click
 .
.
Save Materials to User Library
Store and manage the materials you create in the User Library.
-
From the Feasibility ribbon, Setup tools, click the Materials tool.
-
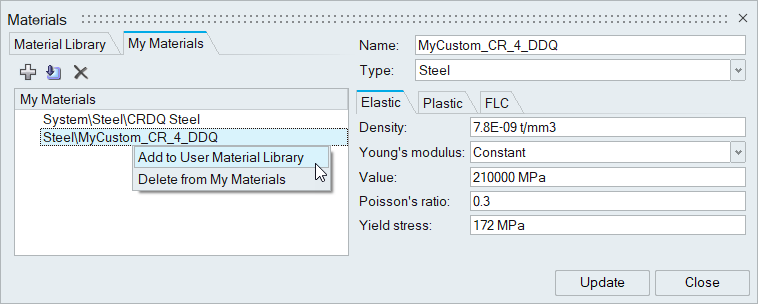
In the Materials dialog, My Materials tab, right-click on
the material you would like to save, and select Add to User Material
Library from the context menu.
Import Materials
Import materials in the My Materials tab.
-
From the Feasibility ribbon, Setup tools, click the Materials tool.
- In the Materials dialog, click the My Materials tab.
-
Click the Import Materials
 icon.
icon.
- Browse to the downloaded material file and click Open.
- Right-click on the imported material and select Add to User Material Library from the context menu to save to the user library.
Assign Materials to Parts
Assign user defined materials to parts, or assign commonly used default sheet metal materials to parts.
-
Assign a material from My Materials to a part.
New materials created in the current session, or materials added to the session from the library through assigning the material to a part are stored in My Materials.
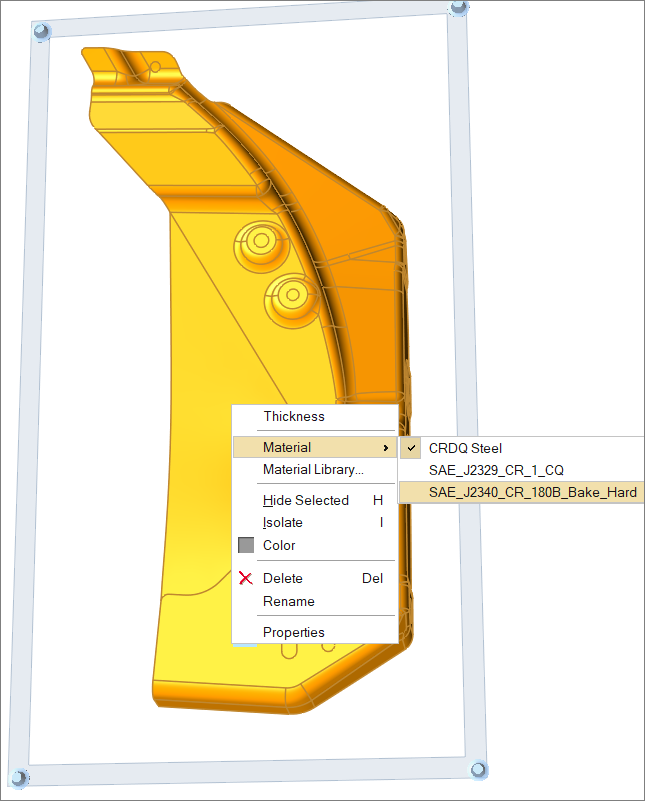
- In the modeling window or Model Browser, right-click on the part and select from the context menu.
-
Assign a material from the Material Library to a part.
The materials you have created, along with a set of commonly used default shell and solid materials are stored in the Material Library.
- From the modeling window or Model Browser, right-click the part and select Material Library from the context menu.
- In the Materials dialog, select a material to assign to the part.
- Click Assign.
Create User-Defined Materials
Create a material that is based on user-specified values.
-
From the Feasibility ribbon, Setup tools, click the Materials icon.
- In the Materials dialog, select the My Materials tab.
-
Click the Create Material button:
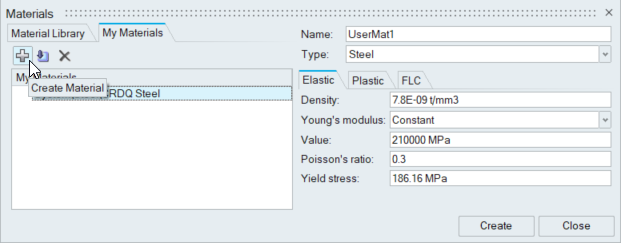
- In the Name field, enter a name for your material.
- In the Type field, select the material on which you would like to base your new material.
- For each tab, Elastic, Plastic and FLC, enter the properties required for your material. If you have material properties defined in a spreadsheet, you can can copy and paste the values directly into the Materials dialog.
-
Click Create.
The new material is created and stored in My Materials.
Create and Assign a Material Based on Test Data
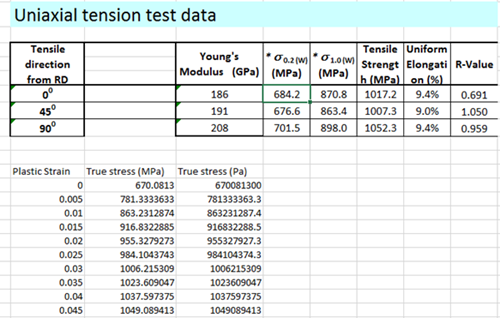
Create a new material with test data from a .xlsx file.
-
In Microsoft Excel, open and review the file
<installation_directory>\InspireForm2025\tutorials\Material_Data.xlsx. The data
should look something like this:
Note: You can copy data from an .xls file and paste it directly into the relevant property fields of the Materials dialog in Inspire Form. -
From Inspire Form, on the Tryout tab,
click the Materials icon.
- In the Materials dialog, select the My Materials tab.
-
Click the Create Material button:
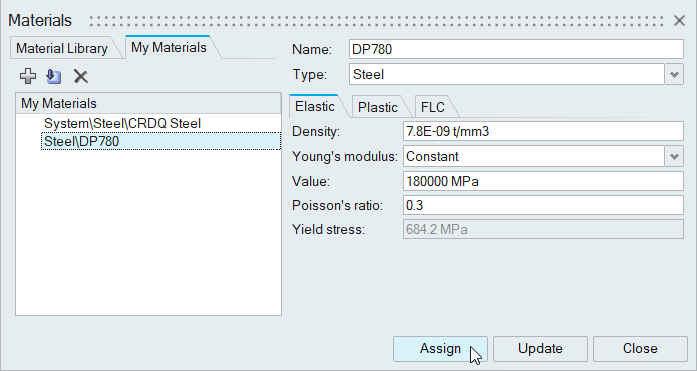
- In the Name field, enter DP780.
- In the Type field, select Steel.
-
Select the Elastic tab.
-
For Yield stress, enter the value from the .xlsx
file: 684.2MPa

-
For Yield stress, enter the value from the .xlsx
file: 684.2MPa
- Select the Plastic tab.
- For Stress-Strain, select Data Points (True).
-
Find the parameter values in the .xlsx file and enter them in
Anisotrophy as follows:
- For R00, enter 0.691.
- For R45, enter 1.050.
- For R90, enter .959.
-
For Yield criterion, select Barlat 3
parameter.
Note: Inspire Form supports the following Yield Criteria: von Mises, Hill 1948, Barlat 2000, and Barlat 3 parameter.
- For Exponent (m), select 6.0.
- Click the Data Points button to expand the columns for True Strain and True Stress.
-
In the first cell of the True Strain column, right-click
and select Clear All.
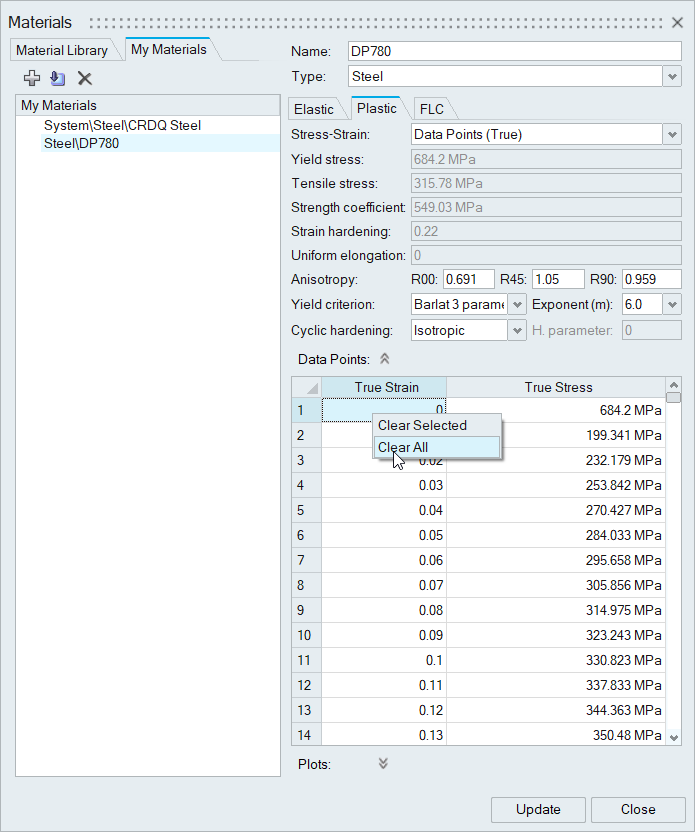
The existing data points are removed. -
Copy the Plastic Strain and True Stress
(MPa) columns in the .xls file, and paste them in the
Data Points columns in the Materials dialog.
The new values are added to your material definition.
-
Click the FLC tab.
-
Click Create.
Steel DP780 is added to My Materials.
- Click Close.
-
To assign the new material, right-click a part on the model and select
Material Library from the context menu.
The Materials dialog appears.
- Click the tab, My Materials.
- Select Steel DP780.
-
Click Assign.
- Click Close.