Train Your Own Model
Tutorial Level: Beginner In this tutorial, you will use physicsAI to train your own model.
Before you begin, copy the file(s) used in this tutorial to your
working directory.
Note: Unzip the project hvac.zip and inspect the contents:
- inputDataRecomp contains seven results in h3d format (Training files)
- testDataRecomp contains two results in h3d format (Testing files)
- newDesigns contains two files (for Prediction)
In this tutorial you will:
- Open HyperMesh and create a project using the PhysicsAI toolbar.
- Create two datasets separately for training and testing.
- Train the ML model using the training dataset and view the logs.
- Test the ML model on HVAC_Test_2 and view the results and detailed score report.
- Predict the results on new designs HVAC_concept2_rnd.fem, HVAC_Duct_v3.x_b.
Create Project
In this step, you will open HyperMesh and create a project using the PhysicsAI toolbar.
- Open HyperMesh.
- From the menu bar, click to open the PhysicsAI ribbon.
-
From the PhysicsAI ribbon, select the Create
Project tool.
Figure 1. 
The Create Project dialog opens. - For Project Name, enter Traintestdemo.
-
For Location, click Choose and select a save location
for the project.
Note: The save location for the project contains all files created by PhysicsAI, but the original files used for training do not need to reside in the project folder.
- Click OK.
Create Datasets
In this step, you will create two datasets for training and testing.
-
From the PhysicsAI ribbon, select the Create
Dataset tool.
Figure 2. 
The Create Dataset dialog opens. - For Dataset Name, enter HVAC_Train_7.
-
For File System, click
 and navigate to the
inputDataRecomp folder.
and navigate to the
inputDataRecomp folder.
-
Select and transfer all of the .h3d files.
Figure 3. 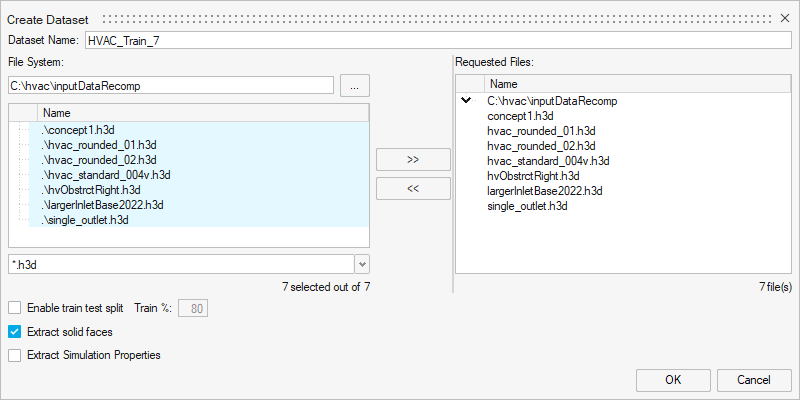
-
Click OK.
The dataset is extracted and the Datasets dialog opens.
-
Create a second dataset.
-
Click
 to reopen the
Create Dataset dialog.
to reopen the
Create Dataset dialog.
-
For File System, click and navigate to
the testDataRecomp folder.
-
Select and transfer all of the .h3d files.
Figure 4. 
-
Click
-
Select datasets to see the extracted datasets.
Figure 5. 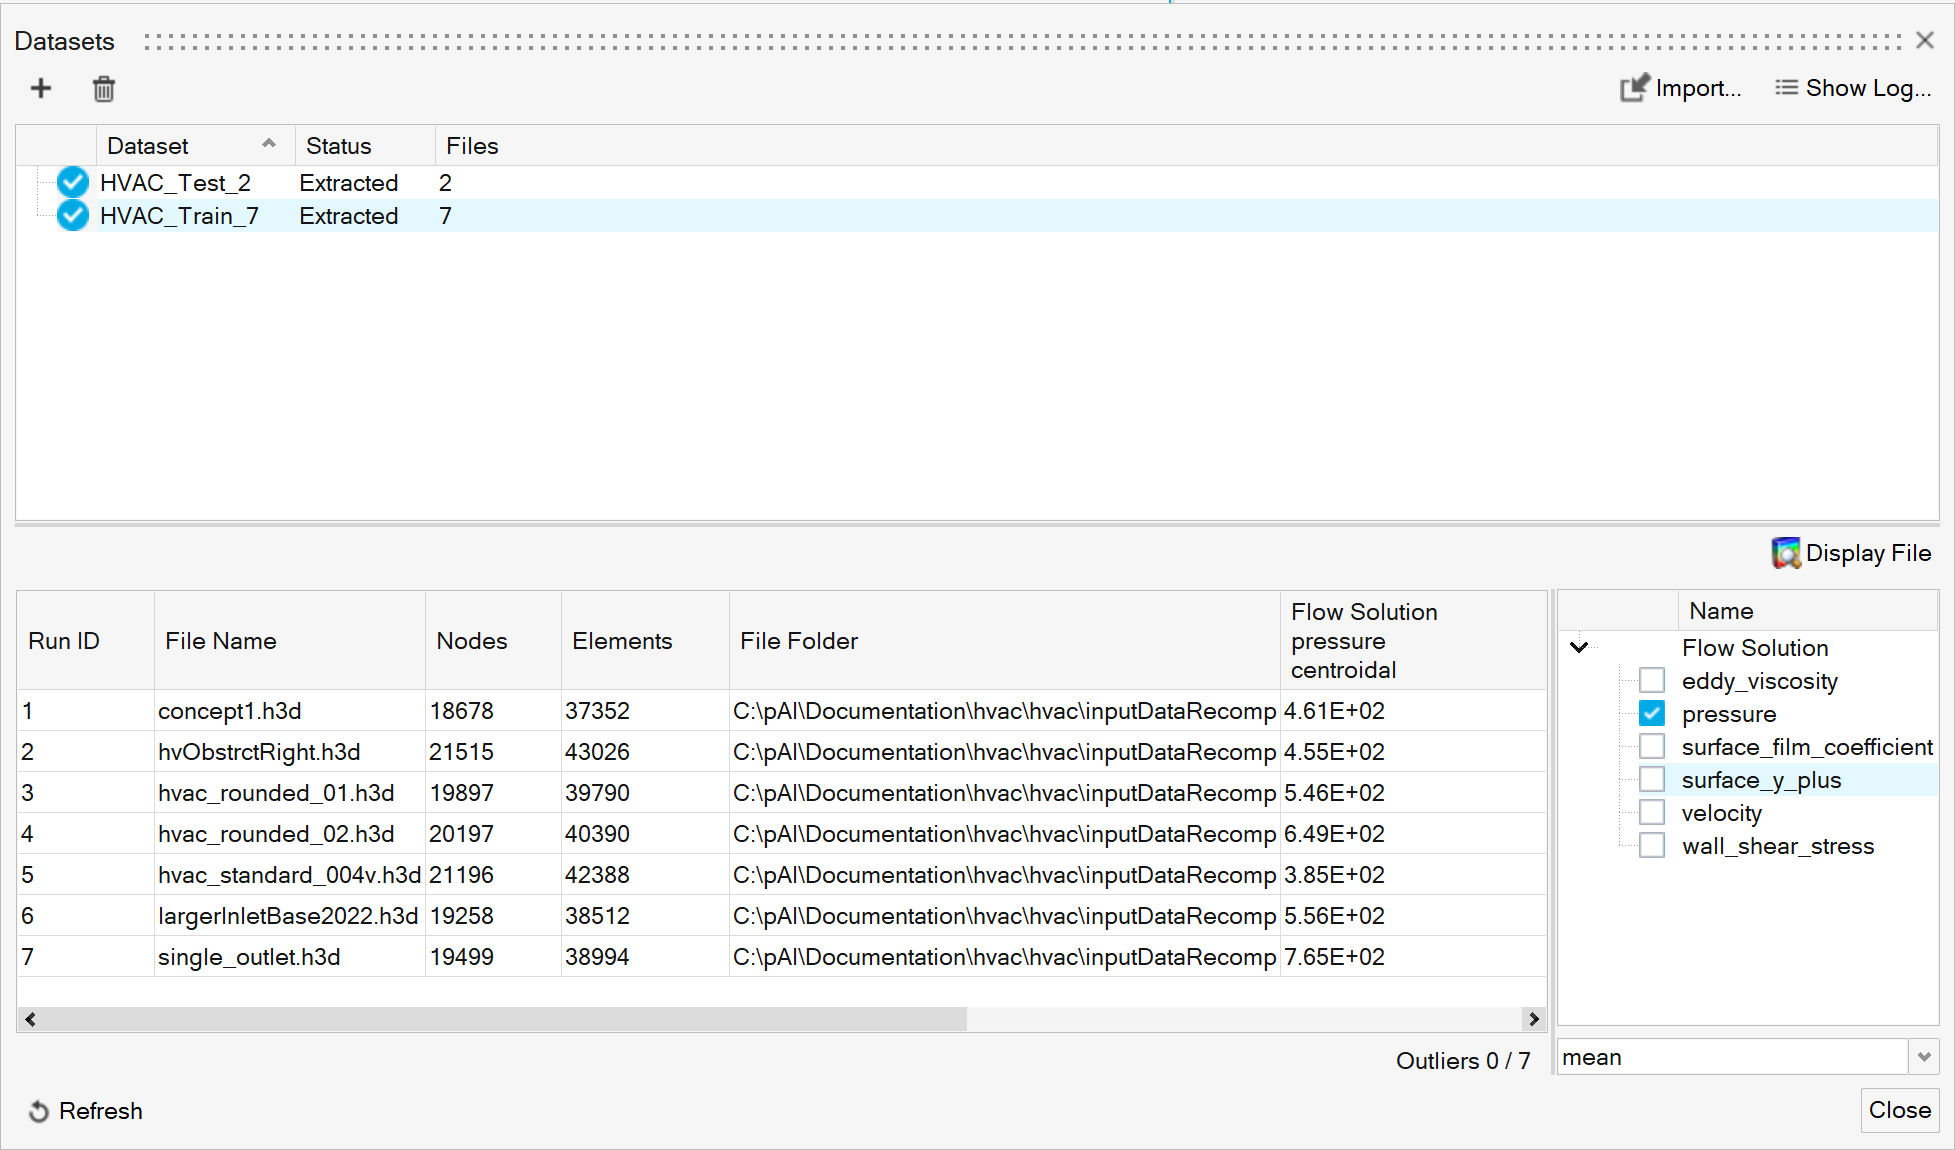
- Click Close.
Train Machine Learning ML Model
In this step, you will train a Machine Learning (ML) model on the training dataset and view the logs.
-
From the PhysicsAI ribbon, select the Train
an ML Model tool.
Figure 6. 
The Train Model dialog opens. -
Define the following details and click Train.
- For Model Name, enter HVAC_Pred.
- For Training Data, select HVAC_Train_7.
- For Inputs, select cae.coord and cae.part_label.
- For Outputs, select pressure.
Figure 7. 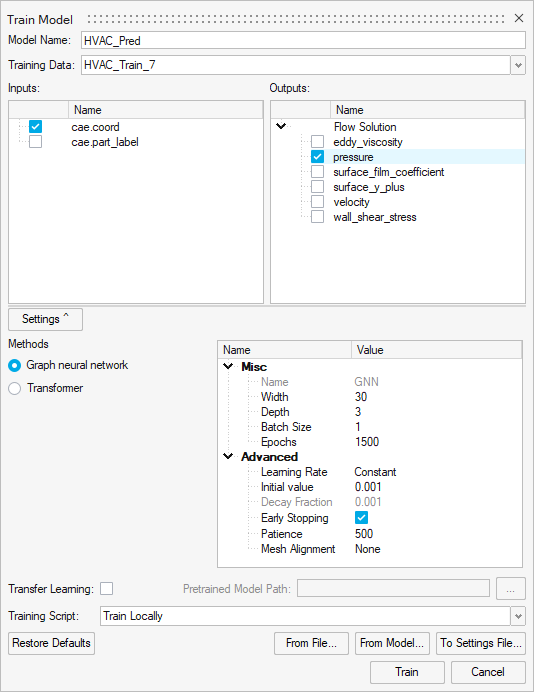
The Model Training dialog opens.Figure 8. 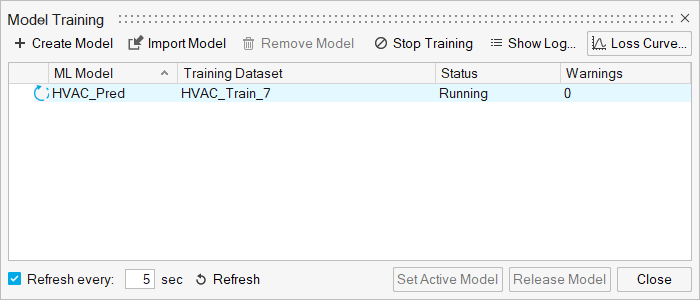
Tip: Once the status changes to Running, you can click Show Log view the training logs. - Once the training is complete, click Set Active Model.
Test ML Models
In this step, you will use the trained model and test this ML models on HVAC_Test_2. You will also view the results and detailed score report.
-
From the PhysicsAI ribbon, select the Test ML
Model tool.
Figure 9. 
The Test Model dialog opens. - In the Models area, select HVAC_Pred.
-
In the Datasets area, select HVAC_Test_2 and click
OK.
Figure 10. 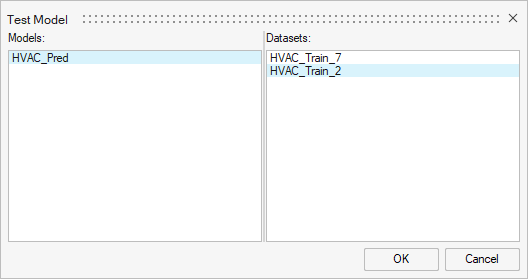
The Model Testing dialog opens. - In the Model Testing dialog, select a Run ID and click Display File to view the results in the modeling window.
- Close the Model Testing dialog.
Use Models
In this step, you will predict the results using HVAC_concept2_rnd.fem and HVAC_Duct_v3.x_b.
- From the newDesigns folder, drag-and-drop the HVAC_Duct_v3.x_b file into the modeling window.
-
In the Load File dialog, verify New
model is selected and click OK.
Figure 11. 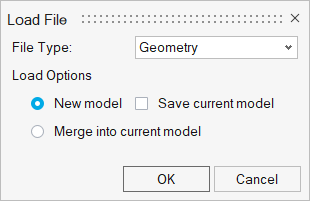
Note: Selecting New model ensures -
In the Import Options dialog, click
Open.
The model opens in the modeling window.
-
From the PhysicsAI ribbon, select the
Predict tool.
Figure 12. 
Figure 13. 
-
Repeat steps 1 - 3 for the HVAC_concept2_rnd.fem
file.
Important: Verify the model isn't loaded on the previously existing geometry by deleting the previous model or by selecting New model in the Load File dialog in step 2.