Add New Material using Data Edit
Add material data to the private database using the Data Edit functionality.
- On the Admin Dashboard, open Data Edit.
- Click
 and then select Add.
 - On the Add dialog box, enter the new material name.
Figure 1. Add Material Name 
- Select the following general material details:
Figure 2. Add Material Details 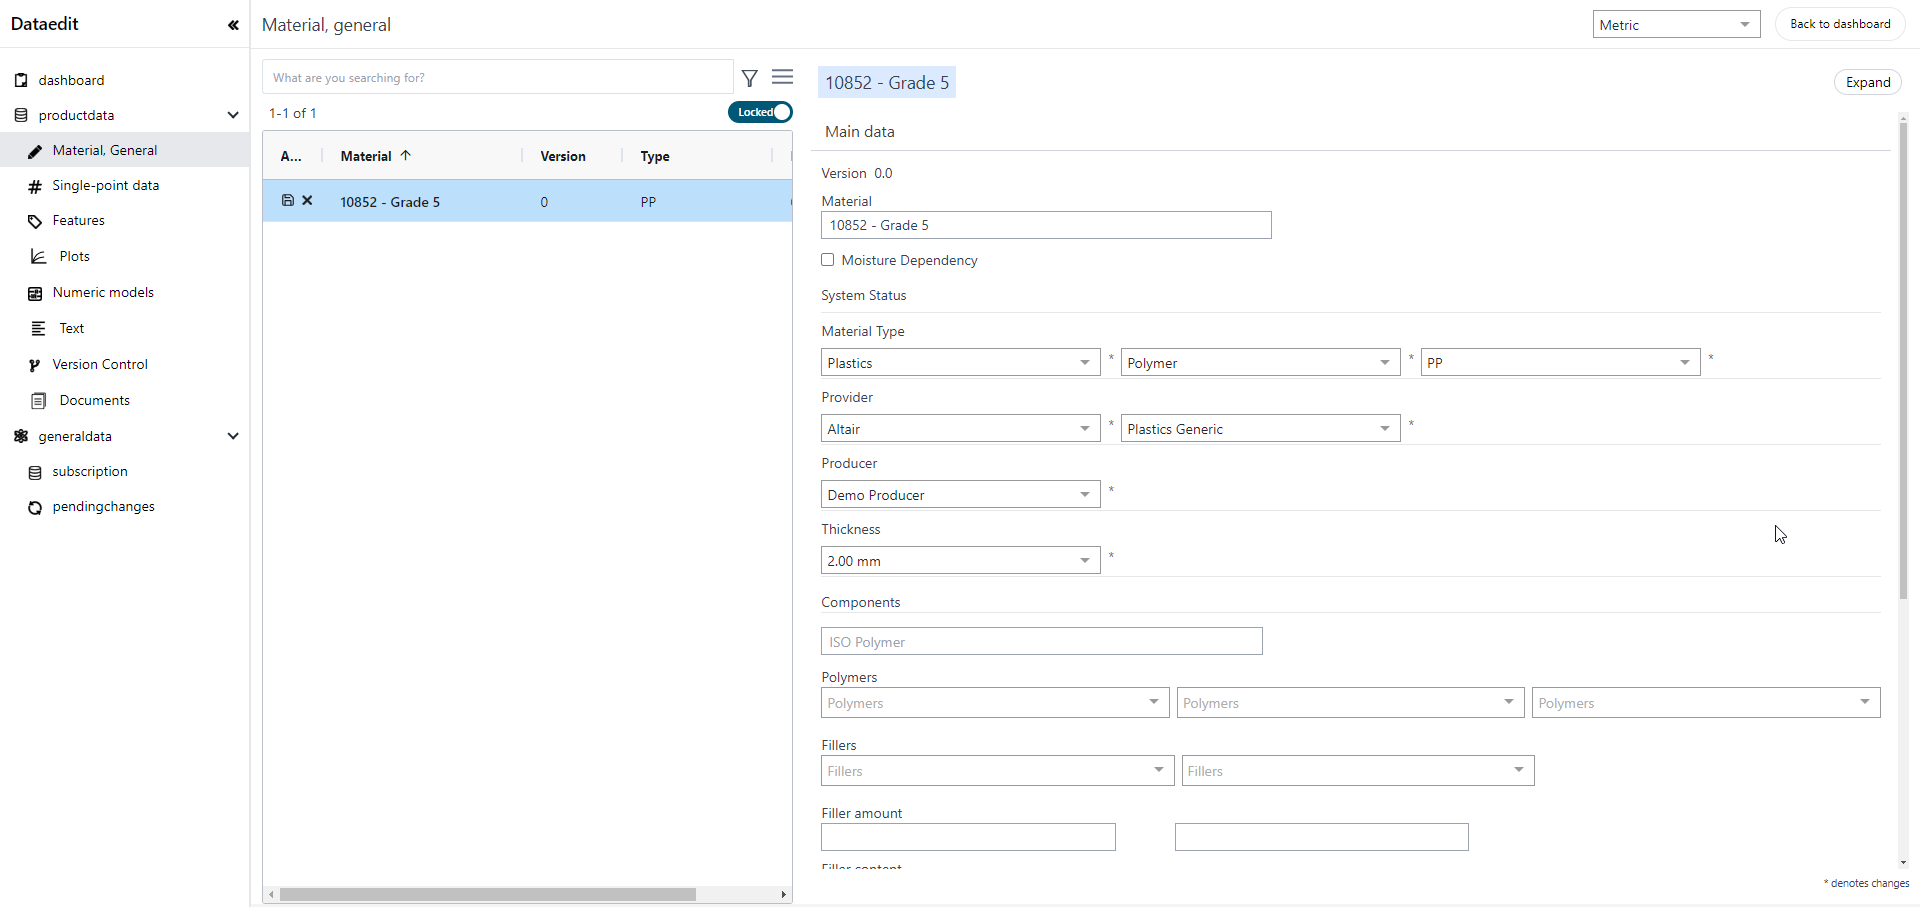
- Choose the required material type or class from the Material Type list box.
- Choose the name of the manufacturer from the Producer list box.
- Choose the name of the provider from the Provider list box.
- Select the required LifeCycle State:
- Unpublished: By default the material is in unpublished state. This means the material is stored in the database, but not visible to SMDC users.
- Published: Once the material specialists or database manager has reviewed the material data, they can approve it for publishing to SMDC users.
Add Single-point Data
- On the left pane, select Single-point data and then
specify values for single point material properties such as Density, Young's
Modulus, and Poisson's Ratio.
Figure 3. Single-point Data 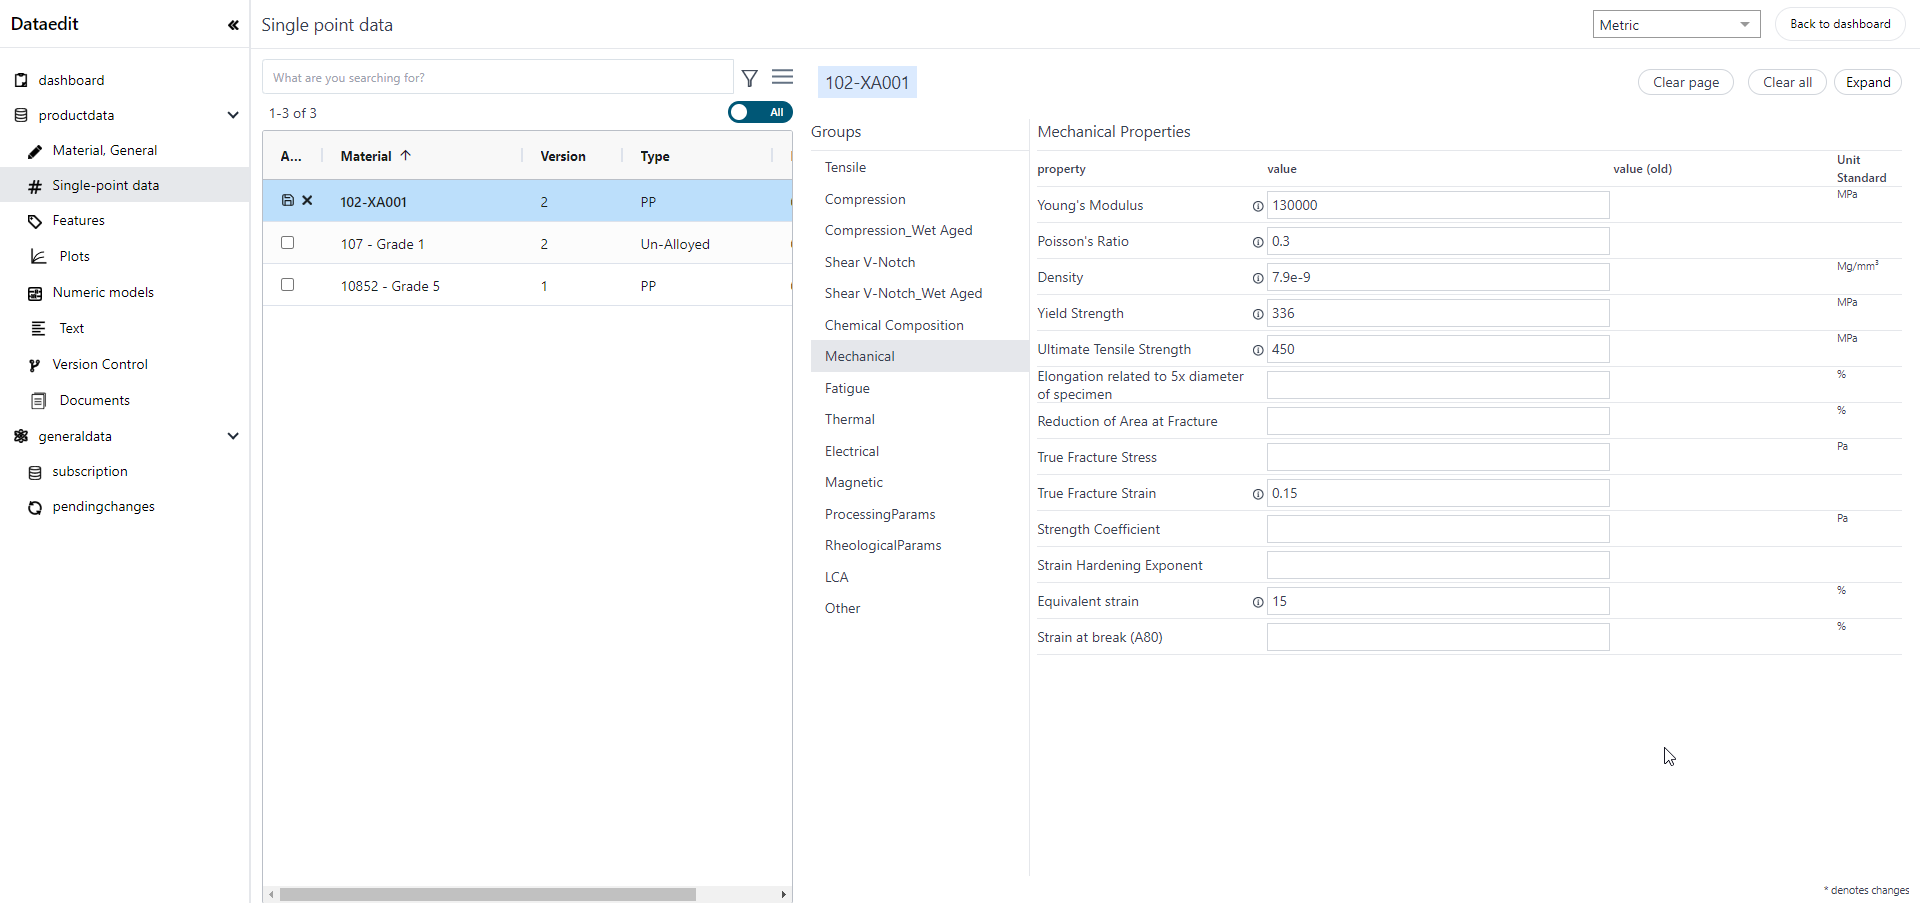
Add Multi-point Data
- Select Plots to specify multi-point material
properties for Stress-strain plots.
Figure 4. Plots 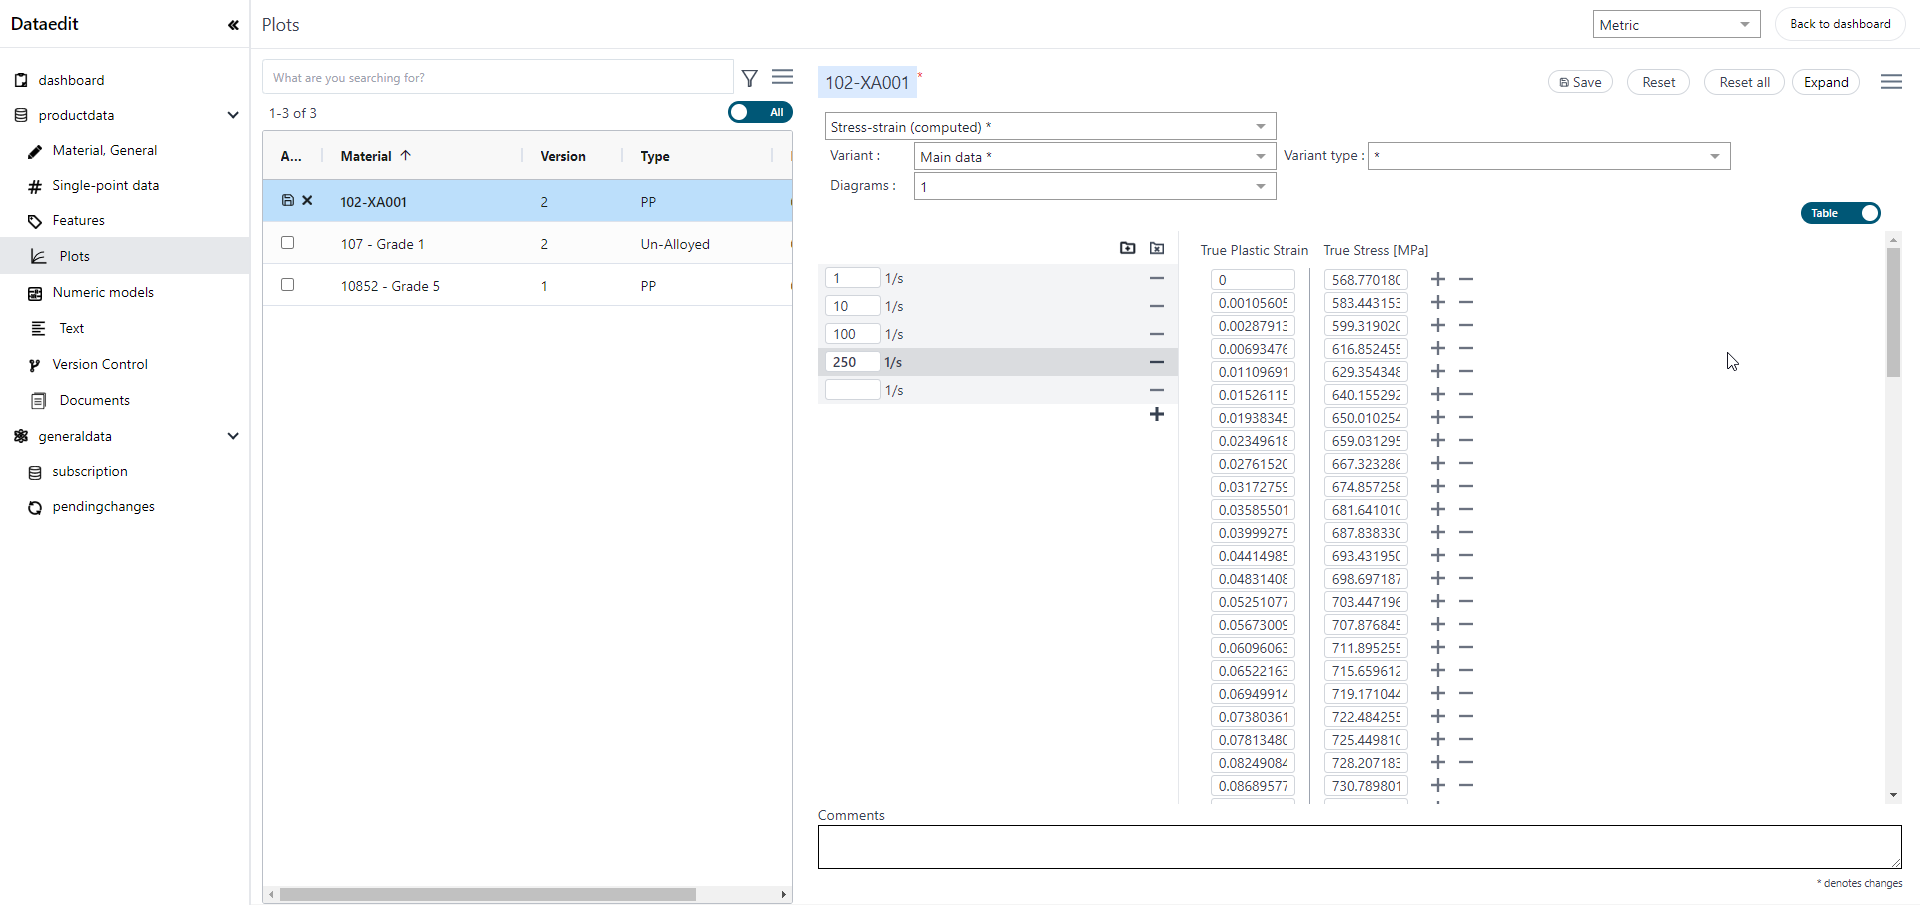
- Select relevant Variant and Variant Type for the plot data.
- Copy the X and Y data from the source file (Excel) and select
Paste Curve from the menu.
Figure 5. Paste Curve 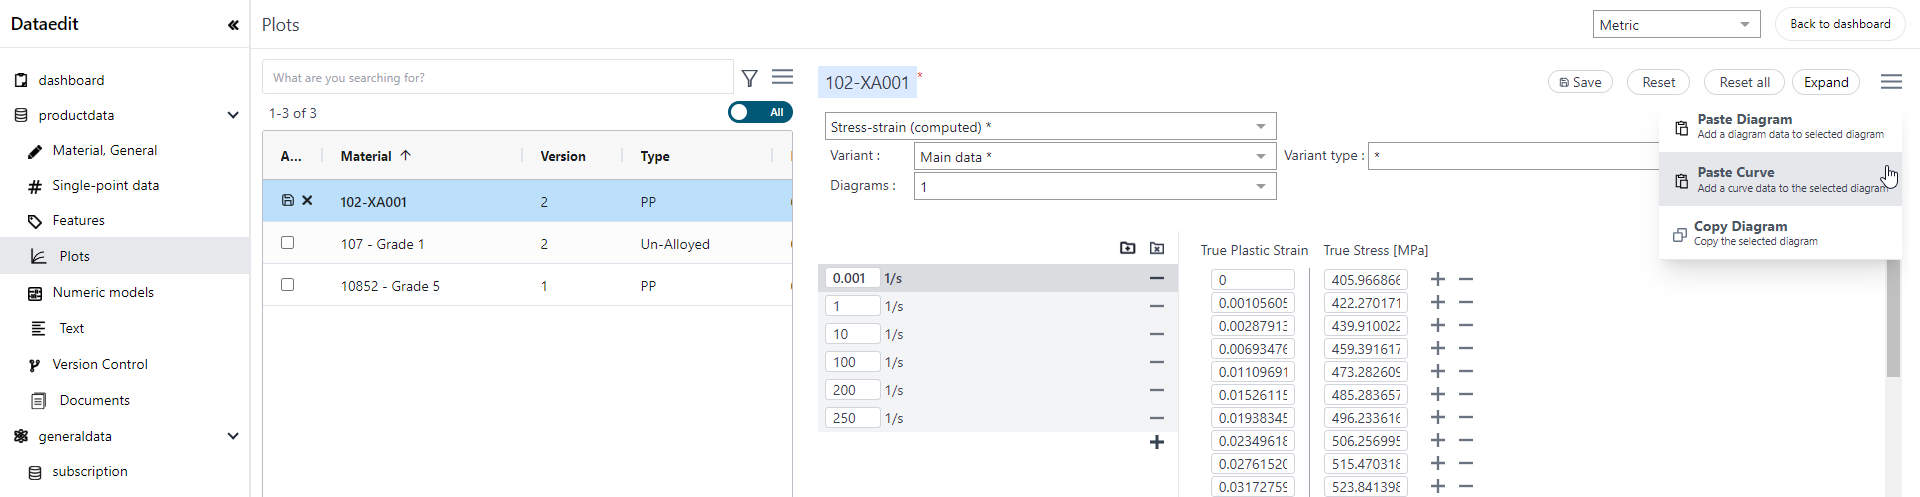
- Alternatively, the properties data can be entered manually for each point data.
- Click Save to save the changes added to the material data.
- Click Commit to publish the changes to material database with version 1.