Customize Filters
Create, modify, and delete a filter.
Create a New Filter
- On the Admin Dashboard, open Catalog Edit.
- Firstly, create a new group to organize the tags used for defining your
filter. To create, navigate to .
Figure 1. Tags 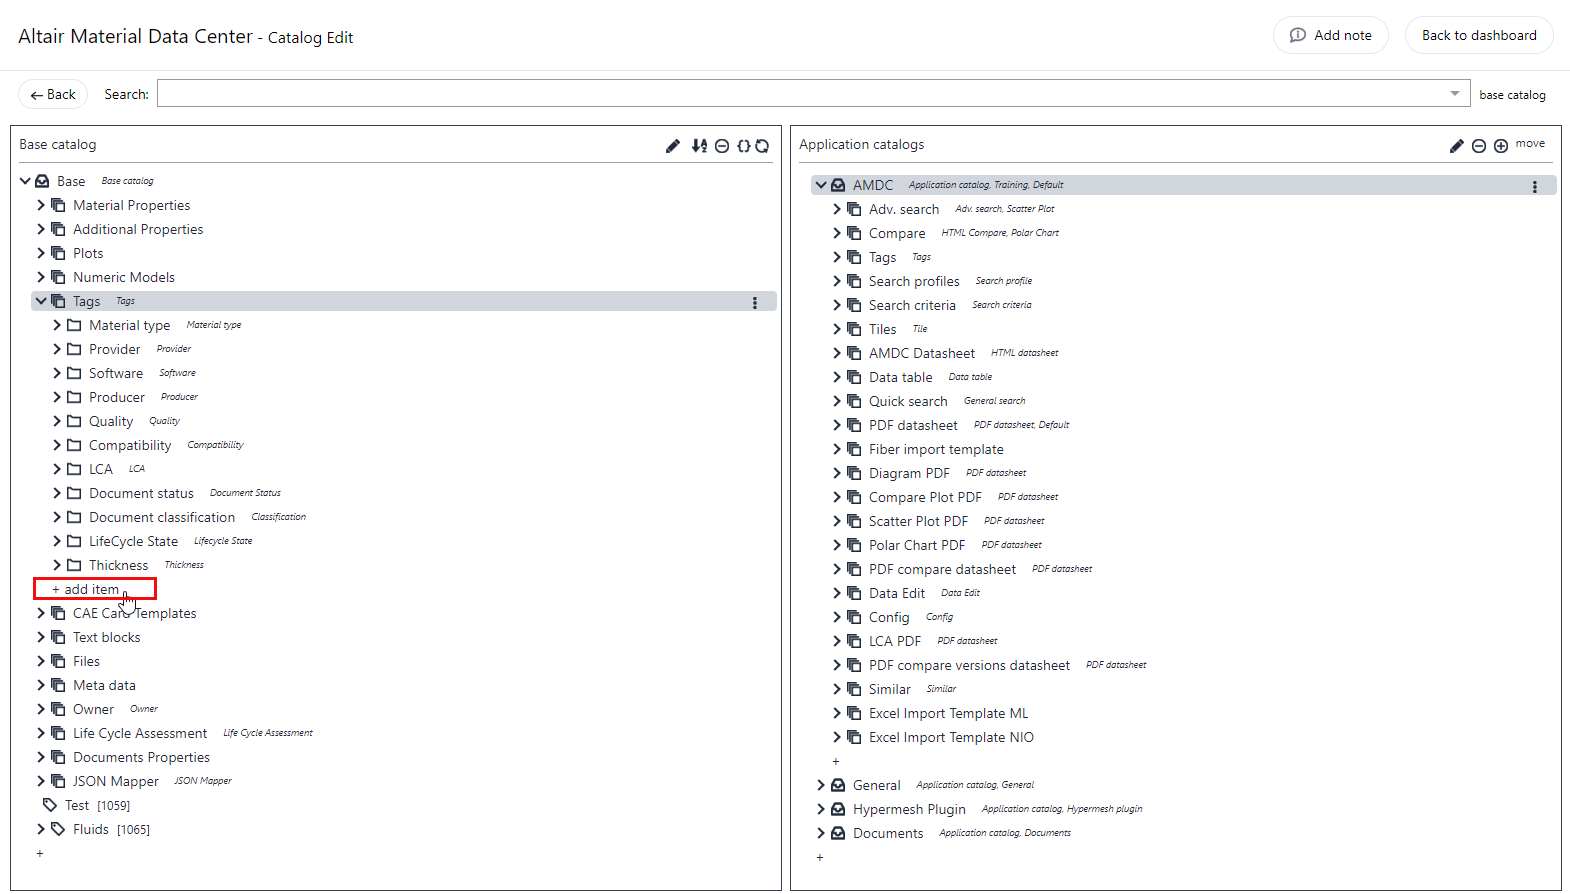
- Click
 .
. - On the Add Item - Group dialog, select Type as
Group from the list.
Figure 2. Add New Group Tag 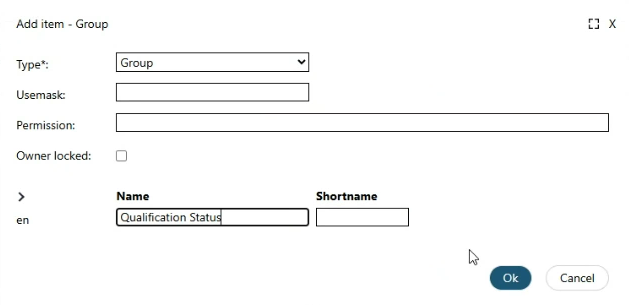
- Enter a new group name in the Name field and then click OK.
- Create tags in the new group by clicking .
Figure 3. Create Tags 
- To add new tags, on the Add Item - Feature dialog, select Type as Feature/Tag from the list.
- Next, create usemask for the filters you want to define in AMDC. Select . The existing usemaks for various tags are displayed.
- Click to add a new Usemask for the filter.
Figure 4. Create Usemask 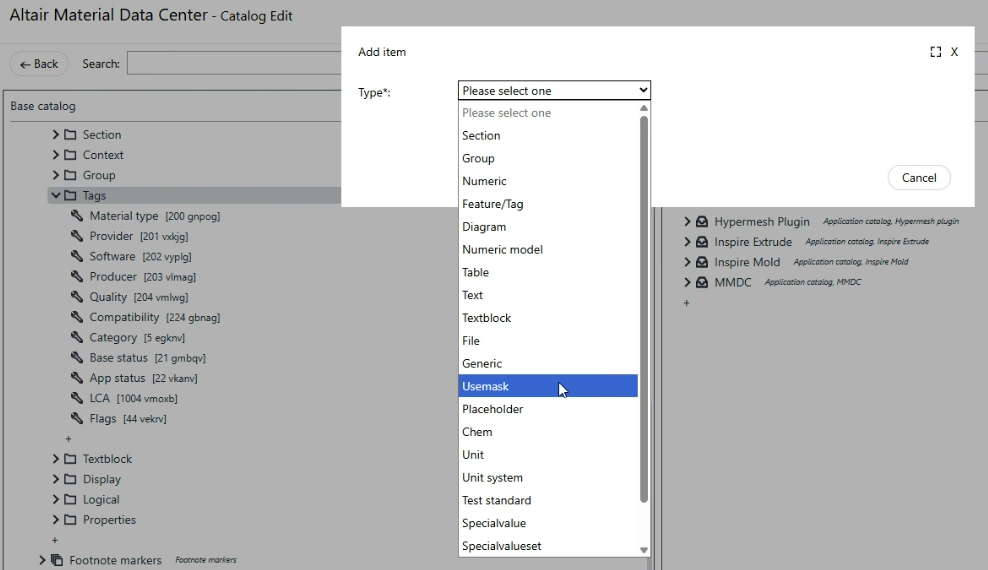
- Enter the Usemask (associated number in square brackets) assigned by AMDC in the definition of the group you created above.
- Find the Generic Tags [17] placeholder under .
- Drag and drop Generic Tags [17] placeholder from Base
Catalog to under AMDC
.
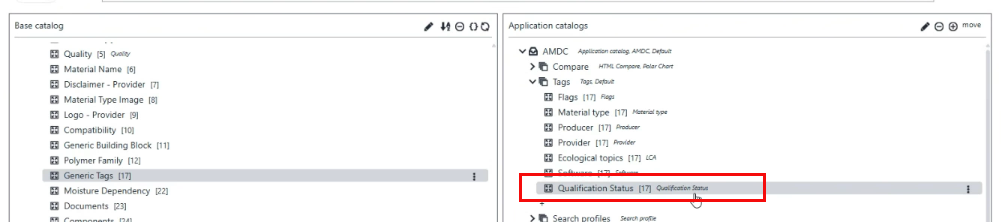
- Double click on this Generic Tags [17] placeholder
(which is under ), rename it as per your requirements, assign the usemask
which we had created earlier.
Figure 5. Edit Usemask 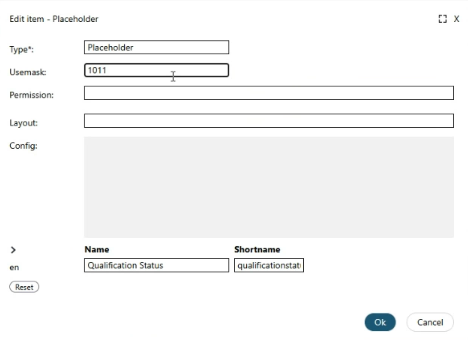
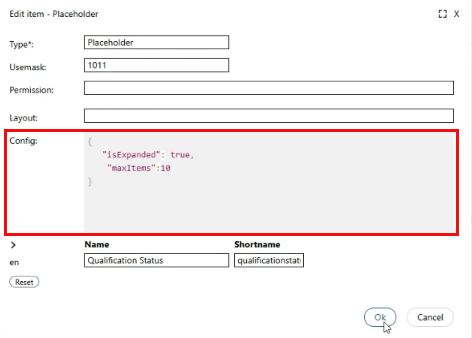
- To display the filter items expanded for the user. In the
Configuration field, enter the following JSON: {
"isExpanded": true, "maxItems": 10 }
Note:
- To collapse the filter by default, modify
"isExpanded"value tofalse. - You can adjust the number of
"maxItems"to be displayed.
Delete a Filter
Remove an existing filter from the AMDC Application Catalog.
- Navigate to .
- Select the required Tag and click
 next to it and then select Delete Item. The selected tag
will be removed.
next to it and then select Delete Item. The selected tag
will be removed.